Encouraging kids to create computer software and hardware by providing support and curricula and inspiring grown-ups to help them. This was a very active project in the early years of our organization and we are now seeking a leader who would like to facilitate the project. If you are interested, email us.
Who this is for:
Here are some stories of volunteer projects and other notes about teaching kids:
24 Mar 2015
Last year Panama City, FL offered the first ever “Railsbridge Teen” and it turned out to be an amazing experience. Most of the effort planning a teen Railsbridge paralleled the organizer cookbook preparation used for a traditional workshops, with just a few exceptions:
Parent Permission and Involvement Several of the parents stayed and decided to go through the curriculum along with their teen and I highly recommend this if possible. For those that chose not to stay we found it best to discuss the following before they leave:
Age Guidelines
We established an original age guideline at 13-18 but we made a few exceptions allowing some as young as 9 to attend if they’d had programming experience. *Sidenote: Yes the 9 year old completed the entire workshop and understood the concepts.
Bypassing Installfest For most of the kids the schedule and transport issues meant committing to a Friday night and full day Saturday would be nearly impossible. We modified the curriculum to plan on not having an Installfest. I’ll be sharing the tools and modifications we used to work around the Installfest limitation.
Food Food for Railsbridge Teen is so much easier than a traditional Railsbridge. Rather than a catered lunch or coffee and breakfast the kids wanted donuts and snacks. Lots of snacks. They asked for $5 pizzas and bags of cheetos and all the world was right. If you can, go ahead and include the attendees in the planning of their own workshop. Teens are very good at telling you what they want.
Venue The process of choosing a venue was not the same as it is for us traditionally with adults. It was essential to look into venues the kids were already comfortable, such as the library meeting room, clubhouses, community centers, etc. In the end we chose a place several kids were already meeting for their school co-op activities. The facility had a kitchen, plenty of tables/chairs, and internet access.
Curriculum Flexbility We did not change any of the core aspects of the curriculum. The teens built Suggestotron just as the adults do and enjoyed it a lot.
Stickers and Rewards I can’t say enough about how such a tiny thing creates HUGE motivation. We had stickers from Stickermule that were a big hit and became the coveted accessory for every laptop in the room.
Stay in Touch A larger percentage of teens in the workshop will be eager to continue and learn more than you may find in a traditional workshop. Consider hosting a monthly meetup with the teens to continue to check on their progress. We’ll share more on follow up in the weeks to come.
Feel free to <mailto: reach out if you have any questions about organizing a Railsbridge Teen in your area. Create the opportunity and they will come.
06 Nov 2010
At RubyConf 2010, a group of RailsBridge volunteers created an innovative kids program with the goal of sharing with the kids a fun experience of programming. Many thanks to RubyCentral, the organizers of the conference who provided the room, and our sponsors, Wealthfront, JumpstartLab and Blazing Cloud who helped us purchase supplies.
We focused on three activities over two days with time each afternoon for unstructured game play. We had a very small group of kids, which was great for a first event. The volunteers who organized and led the activities were Liah Hansen, Sarah Mei, Maxwell Salzberg and Sarah Allen. Jim Meyer also helped with logistics.
We first set up the kids with Interactive Ruby (IRB), which is a command line interpreter and used distributed Ruby to connect to a server. This deserves a longer writeup, but we did this using code from here. More recent code using rinda to avoid specifying an ip address looks promising.
The kids then typed in commands to draw lines, shapes and text which appeared on a single screen. This was effective in their learning from each other and sparking creativity.
After that fun introduction, we copied a set of examples (via USB drive) to each computer and the kids modified the code to change its behavior. This worked well, since typing is boring and the kids could see big effects with small code changes.
Next we had the kids use a scripting language, called Pie, where you can use a hosted development environment, the bakery, to develop scripts and published web-based adventure games. We had two groups of two kids. They pulled creative commons images from Flickr and wrote scripts based on simple examples. Each group created a game: The Path of the Pointy, Sharp Teeth and Labrynth.
Lessons learned: browser-based development is awesome for the quick start. The Pie Bakery needs better error reporting and Flicker integration, since it is a drag to get URLs out of Flickr.
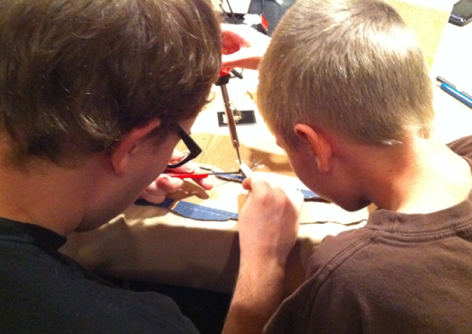
On Saturday, we had just two kids and Max led some soldering, kicking off the activities with a series of videos for inspiration.
13 Sep 2009
I believe that today learning to program is a life skill. Kids should learn to program for the same reasons we teach them biology, chemistry and algebra. Part of the reason is so that they have career choices as adults, but we also value a basic understanding of these fields even for the kids who don’t grow up to be biologists, doctors, chemists or mathematicians. We teach kids basic science and math, so that they will understand the world they live in.
Software surrounds us from mobile phones to ATMs to music and video players. Understanding programming will help kids understand these new elements in our world, their possibilities and their limits. Also, almost every computer software application today has some advanced feature that requires programming-like skills for operation (Excel macros, Word style sheets, advanced searches on Google). Kids are natural investigators. We need to teach them these skills to help them explore the tools at their fingertips.
Sarah Allen
15 Aug 2009
by Sarah Mei
For the last few years I’ve been volunteering one day each summer at the GetSET summer camp in Santa Clara. GetSET is pretty awesome, though their website is horrible. It’s a week-long sleepaway summer camp for girls from under-represented minorities who live in the San Jose area. They first attend the summer before their freshman year of high school, and they return each year with the same group of cohorts.
During the week, they do a variety of half-day and whole-day workshops on different types of engineering - civil, mechanical, aerospace, and, of course, software. In addition, they tour a different college campus each year, and get help with college prep and applications. It’s run by the Society of Women Engineers, and all the administrators, instructors, and TAs are volunteers. (And they always need donations!)
Until this year I was just a TA for various programming classes, which basically meant all I had to do was show up. This year, though, they didn’t have anyone to teach Intro to Java. I’d been working on Ruby on Rails workshops for women, and I saw a chance to extend the work to kids.
“Well,” I said, “I can’t do Java, but if you want to make it Intro to Ruby, I’d totally do it.” I wasn’t expecting them to be too enthusiastic. SWE membership is mostly women who work in large companies, where Ruby doesn’t have much of a foothold, and interpreted languages in general are regarded with some suspicion.
I got the affirmative response in less than 10 minutes. Go SWE!
It was half-day workshop, which means I had three hours with the girls. I quickly realized that wasn’t going to be enough time for even a cursory overview of Rails. But I knew something visual would keep their interest better than cursor/command-line programs (particularly as this workshop was after lunch), plus I knew Sarah Allen had taught Shoes with 4th and 5th graders. So I decided to build on her ideas.
Introduction
You can see the slides I put together (they’re HTML; use the arrow keys to move between them). They’re pretty minimal - before we got started coding, we first did a quick welcome (slides 0-2), agenda and introductions (slides 3-7), and a little bit about “what is programming?” (slides 8-12). For the latter, I said that many people think programming is working in an endless cube farm (slide 9), with weird, possibly insane co-workers (slide 10), and doing a lot of math (slide 11). In fact, programming is more about language (slide 12) than math. I asked who in the class was bilingual; most of them raised their hands. I said programming is about learning to speak the language of the computer. I could see the lightbulbs lighting up!
Then we talked about Ruby and Shoes (slides 13-17). I asked who had ever been a translator, going between someone who didn’t speak English and someone who did - most raised their hands. I said the Ruby interpreter (slide 13) translates your Ruby code into something the computer can understand, just like a human interpreter translates from one language to another. Shoes (slide 14) translates your Shoes code into something Ruby can understand. Your program is on top of the stack (slide 16).
Then I explained the workflow we’d use to program (slide 18). We had a folder on the desktop to hold the source file. To open the source file for editing, we dragged it to the Notepad shortcut. To run it, we dragged it to the Shoes shortcut. This worked really well - much more successful than the edit-compile-run cycle that we had done in the Java class in years prior.
That was the end of the slides. After that, it was all collaborative coding!
Philosophy
This is an introduction to programming, so I focused on getting them excited about programming and what it can do. This meant that they got away with some horrible style, and, once in a while, some magic incantations.
Ruby purists may protest that I didn’t talk about objects, or classes, but for the ones who keep going with programming, they’ll get that soon enough. In this class, I just wanted them to have fun and see what they could do with code.
Despite that focus, they formed an intuitive understanding of some pretty sophisticated programming concepts, as you’ll see below.
Setup
I had them start with a blank file. Last year, I was a TA in Akkana Peck’s Javascript class with this same group of girls when they were juniors. The Javascript class is their first programming class, and the girls start with an almost-working Javascript file and edit it to get it working. This time, I wanted to show them how in programming you really can start with nothing, and end up with something really cool.
Together we wrote an etch-a-sketch program in a series of small steps. I used the agile development philosophies of short iterations and frequent deployment to drive the project. Short iterations means that each step is a fairly minor change - we add one thing that the program didn’t have before. Frequent deployment means that we ran the code constantly to get strong visual feedback that they were making progress. These in combination seemed to hold everyone’s interest.
For each step, I coded live on the projector with Notepad’s font at 48pt. Then I ran the program to show them what the modified output would look like. Then I switched back to the code, got up, and walked around with the TAs to help the girls troubleshoot when they hit errors trying to make the change that was onscreen. There were 20 girls, 2 TAs, and me. The TAs were fabulous, but this was a pretty large class. Having one more TA - for one helper per five girls - would have been perfect.
Step 0 - a blank application
Shoes.app do

end
Here we talked about do/end. I didn’t explain blocks, exactly; I just said they’d be seeing the do/end combination in other places, and it just signifies the beginning and end of a section. Most of them typed shoes instead of Shoes at first, so we also talked about how computers are picky about spelling and capitalization of some words.
When you run this, you get a blank window titled “Shoes,” which I don’t think is super exciting, but the girls thought it was pretty cool.
Step 1 - add some text
Shoes.app do
  para "Hello, world"
end
Here we talked about strings. I said they could put whatever they wanted inside the quotes - the computer isn’t picky about spelling and capitalization there. It’s a sort of free zone for text. Also, I explained that para is short for “paragraph” the way app is short for “application,” and that they’d be seeing a lot of abbreviations in programming.
For several folks that was an a-ha moment; para is the Spanish word for “for,” as in something “para usted” is “for you,” and they’d been thinking Shoes spoke Spanish!
Step 2 - add some attributes to the text
Shoes.app do
  para "Hello, world", :align => "center", :size => "xx-large"
end
Here we talked about attributes as qualities that you attached to a particular object. In this case, we’re attaching them to the paragraph object, so they’re on the same line as para.
The girls ran into a few issues here getting the punctuation right - commas after everything, colons before the attribute names, hashrockets (=>) between attributes and their values, and quotes around the values. I didn’t explicitly talk about symbols, hashes, parameters, or implied hashes at the end of a method call. Instead I just pointed out that attributes always go at the end of a line, after the important stuff like what text you want.
Step 3 - custom window title
Shoes.app :title => "My awesome application" do
  para "Hello, world", :align => "center", :size => "xx-large"
end
We went through this one pretty quickly because the girls were eager to get on to changing the background color. But I did point out that this time we’re attaching an attribute to the entire program, instead of to a particular piece of it, so therefore it goes on the Shoes.app line.
Step 4 - background color
Shoes.app :title => "My awesome application" do
  background tomato
  para "Hello, world", :align => "center", :size => "xx-large"
end
I encouraged the girls to try other named colors. When fushia didn’t work but fuschia did, we talked again about the computer’s pickiness. When dark red didn’t work but darkred did, we talked about identifiers, and how they can’t have spaces.
One girl asked if we could add an attribute to the para object to change the text color. Aha, they were paying attention when we talked about the scope of attributes! I didn’t know the attribute name, so I looked it up. As I did so, I talked about how you don’t have to memorize how everything is done to be a good programmer. You just need to know where to find out.
Step 5 - text color
Shoes.app :title => "My awesome application" do
  background tomato
  para "Hello, world", :align => "center", :size => "xx-large",
                       :stroke => saddlebrown
end
They played around with named colors some more. Once they found a few colors that bona fide didn’t exist as named colors in Shoes, like “copper,” we looked at the color page in the Shoes manual. Each color there has its equivalent rgb call underneath. I explained that you could say tomato, or you could equivalently say rgb(255, 99, 71). The first number is red, the second color is green, and the third color is blue, and every color is a combination of those three colors. Since tomato is a reddish color, its first number, the red, is high relative to the other two.
If the color you want isn’t named, you can use its rgb equivalent. I asked for suggestions for a color to try to make, and we settled on periwinkle. I sat down at the projector and erased tomato and replaced it with rgb(. Then I asked: the first number is red, the second color is green, the third color is blue, so what three numbers should I try?
The shouted suggestion was 100, 0, 100. I put that in, saved it, dragged it onto Shoes, and we got a really deep purple. I went back to color page in the Shoes manual, and we looked at how the light colors like antiquewhite and beige have pretty high numbers for all three colors. On the other hand, black has all zeroes. So which direction should we take the numbers to get a lighter purple? They totally got it. Some girls tried really high numbers, like 500, and the color looked the same as lower numbers, like 300. So we talked about how the highest is 255, though I didn’t touch on binary or why that’s the limit.
At this point we took a break, and some of the girls continued experimenting with RGB values on their own. When we came back, a few girls had worked out pretty good versions of periwinkle, which is something like rgb(180,170,205). But how do you add it to Shoes’ list of colors?
This gave us the opportunity to talk about methods and objects a little bit. I pointed out that in our list of para attributes, they all had quotes around them except for saddlebrown. That’s because saddlebrown is a method call, while the other two are strings. We need to add a periwinkle method, and then we call it like all the other ones.
Step 6 - named color method
Shoes.app :title => "My awesome application" do
  def periwinkle
    rgb(180,170,205)
  end
  background periwinkle
  para "Hello, world", :align => "center", :size => "xx-large",
                       :stroke => saddlebrown
end
I pointed out def/end as another set of section delimiters like do/end. In this case, we’re saying that this method starts with def, short for “define” a method, and ends with end. I also talked about whitespace a little bit, because most of the girls weren’t using any indentation in their code. I pointed out that indenting like I had done can help you keep track of your ends. This got more important later on!
And now for something completely different
We got a lot of mileage out of colors, which I wasn’t expecting. I thought we’d run quickly through background colors and get into event loops before the break, but the girls were enjoying adding their own color combinations, and I did get to talk about RGB, which I hadn’t been expecting to do.
Now though it was time to move on, so I announced that we were going to do something completely different - make the application interactive.
Step 7 - adding a button
Shoes.app :title => "My awesome application" do
  def periwinkle
    rgb(180,170,205)
  end
  background periwinkle

  button "Change the text" do
    @headline.text = "I'm changed!"
  end

  @headline = para "Hello, world", :align => "center",
                                   :size => "xx-large",
                                   :stroke => saddlebrown
end
We added two things: a button block, and an assignment. Here I talked about variables: stuff that you want to be able to get ahold of again later. In this case, we’re assigning our para object to a variable called @headline and saving it, so that when someone presses the button, we can change its text.
I pointed out the do/end associated with the button block. At this point, a lot of girls were starting to have syntax errors because they forgot an end somewhere, and some got so annoyed that they actually started indenting. Success!
Step 8 - coordinates
Shoes.app :title => "My awesome application" do
  def periwinkle
    rgb(180,170,205)
  end
  background periwinkle

  animate do
    @button, @left, @top = self.mouse
    @headline.text = "#{@button} #{@left} #{@top}"
  end

  @headline = para "Hello, world", :align => "center",
                                   :size => "xx-large",
                                   :stroke => saddlebrown
end
In this step, we replaced the button block with an animate block that displays the current mouse coordinates in the para element. All window applications have an “event loop” that runs several times a second and checks for input. In this case, our animate block runs several times each second. Inside it, we call a built-in method in Shoes (like the color names are built-in methods) that gives us the current mouse coordinates. It gives us 3 numbers, which we store in 3 variables: @button, @left, and @top.
The coordinates for the window start at 0, 0 in the top left corner. @left is how many pixels from the left-hand side of the window the mouse is, @top is how many pixels down from the top the mouse is, and @button tells us whether or not the mouse button is pressed. They didn’t totally get it until they wrote the code and saw it working, and saw how it updated the numbers whenever they moved the mouse or clicked inside the window.
The string interpolation was the hardest part to explain, and to help them with. @button, @left, and @top are numbers, but they need to be strings if we want to display them in the para element. So we use #{} to turn them into strings. For most of the girls this was pretty much a magic line, I think, but since it was only there to demonstrate how the animate block works, I didn’t worry about it too much.
I gave them some time to experiment with the coordinates - pushing the mouse all the way up into a corner, running it down along one of the edges, etc.
Step 9 - drawing lines based on mouse coordinates
Shoes.app :title => "My awesome application" do
  def periwinkle
    rgb(180,170,205)
  end
  background periwinkle

  animate do
    @button, @left, @top = self.mouse
    line 0, 0, @left, @top
  end

  @headline = para "Draw!", :align => "center",
                            :size => "xx-large",
                            :stroke => saddlebrown
end
In this step we replaced the para text replacement with a call to line, which draws a line between the first two coordinates and the second two coordinates. In this case, we’re drawing a line from 0, 0 (the top left corner) to the current location of the mouse.
This went pretty quickly, and it really drove home that 0, 0 is the top left corner of the window. Some of the girls experimented with different origins so they could draw circular stars which I thought was a cool addition.
One thing we did during this step that didn’t work so well was to change the names of @left and @top to the more descriptive @mouse_column and @mouse_row. I talked a little about how you need to give variables descriptive names, but the new names were too long to see effectively in 48-pt font on the projector, and it’s really tedious in Notepad to make sure you replace all the instances of @left and @top.
I realize now, as I mentioned in the Philosophy section, that with beginners, you can’t be too fussy about style. If they want to skip indentation altogether and give all their variables one-letter names, that’s fine, as long as they’re still excited about what they’re doing.
If they keep going with it, they’ll realize that there’s a reason you indent and give your variables descriptive names, and they’ll start doing it. But if I just tell them to, they won’t. And nothing ensures that they drop it like a hot potato better than harping on them to write maintainable code.
Anyway! Moving on.
Step 10 - only drawing a line when the button is down
Shoes.app :title => "My awesome application" do
  def periwinkle
    rgb(180,170,205)
  end
  background periwinkle

  animate do
    @button, @left, @top = self.mouse
    unless @button == 0
      line 0, 0, @left, @top
    end
  end

  @headline = para "Draw!", :align => "center",
                            :size => "xx-large",
                            :stroke => saddlebrown
end
This was another fairly quick change - all we added was the unless block around the line call. Now it only draws a line when a mouse button is down, which allowed the girls to better control what the stars looked like.
We did talk a little bit about = (assignment) and == (comparison). Because they already knew from the previous steps that @button was 0 when no mouse buttons were down, it seemed to make sense to them that we weren’t assigning it zero.
Step 11 - drawing from previous to current coordinates
Shoes.app :title => "My awesome application" do
  def periwinkle
    rgb(180,170,205)
  end
  background periwinkle

  animate do
    previous_left = @left
    previous_top = @top
    @button, @left, @top = self.mouse
    unless @button == 0
      line previous_left, previous_top, @left, @top
    end
  end

  @headline = para "Draw!", :align => "center",
                            :size => "xx-large",
                            :stroke => saddlebrown
end
I thought this would take us a long time to get through, but to my surprise, the girls seemed to pick it up really quickly. We had already talked about variables and how you use them to store something you want to get ahold of later. So I asked them: each time you run through the loop, what’s the value of @left and @top before you call self.mouse?
They got it - at that point, those variables contain the values you set them to the last time you ran the loop. So we save them again before we replace them with the current values, and then we draw a line from the old values to the new values.
Ta-da, it’s a drawing program! They played around with it for a while. One girl discovered she could change the line color by adding a :stroke attribute to the line call; that was a popular addition. Another girl dug into the documentation she had seen me use, and figured out how to use the color picker to let the user select a color for the line!
Step 12 - a clear button
Shoes.app :title => "My awesome application" do
  def periwinkle
    rgb(180,170,205)
  end
  background periwinkle

  animate do
    previous_left = @left
    previous_top = @top
    @button, @left, @top = self.mouse
    unless @button == 0
      line previous_left, previous_top, @left, @top
    end
  end

  button "Clear" do
    background periwinkle
    @headline.remove
    @headline = para "Draw!", :align => "center",
                              :size => "xx-large",
                              :stroke => saddlebrown
  end

  @headline = para "Draw!", :align => "center",
                            :size => "xx-large",
                            :stroke => saddlebrown
end
The last addition we had time for was a clear button, so that the girls didn’t have to quit the program and start over to get a fresh drawing surface. It was pretty straightforward. You have a button block (which we’d seen before, when we changed the paragraph text), and then you remove the old text, which is now underneath the background, and redraw it on top of the background.
If you don’t remove it, even though it’s now underneath the background, it will get in the way of a new one being drawn, and your headline will slowly creep down the window. This gave us the opportunity to talk about the Z-axis, and how, conceptually, some things are on top of other things in the window.
Conclusions
The girls rated the workshop quite highly, so I think it was a success. Next time I do this, though, I’ll make a few changes:
Arrange some extra curriculum steps in case everyone’s going faster than I expect. The girls got a lot further with the application than I thought they would. I originally only planned out as far as the Clear button, figuring we’d be lucky to get through saving the previous coordinates. But we got through everything, including the RGB detour, with just enough time at the end to implement Clear.
Prepare a handout with challenge goals for each step. Some girls got through everything really quickly and then looked for more to do. While most found the Shoes manual and started experimenting, a few started doing meebo and facebook. A little more direction would have helped channel their enthusiasm instead of letting it dissipate between steps.
Prepare a handout with URLs to resources and directions for downloading and installing Shoes themselves.
Buy some cheap USB keys so they can take home their .rb file, a Shoes installer, the reference code, and copies of the handouts in digital form.
Teaching this class was a fantastic experience, and having the two TAs - both experienced programmers, but new to Ruby and Shoes - was invaluable. Thanks to Alice Callen and SWE for letting me put this together. I hope I’ll be able to do it again next year.
In the meantime, feel free to use my slides and code as the basis for your own Ruby workshop. Everything is available at Github. I’ve released my slides under the Creative Commons Attribution license, and the code under the MIT license.
I’d love to get your ideas on how to improve this workshop. You can fork the project on Github, or leave a comment on this post.
11 Aug 2009
Hello World! is a delightfully approachable first programming book. It provides a thorough introduction to the Python language, but it is really about teaching programming in general. I read the book from the perspective of teacher, rather than student. I know many programming languages and teach programming workshops to both kids and adults. Based on my experience, I would recommend this book for teens or adults on their own. There’s a lot of reading for younger kids, but I think the exercises would be suitable for ages 8 and up if led by a grown up or older kid. Of course, I also believe that a truly motivated kid can do anything, so if yours is avidly into computers and a good reader, “HelloWorld!” could be a great adventure at any age. I like the vibrant mix of hands-on experiential learning, discussion of concepts and historical context.

In my own teaching, I have found that it is essential for students to have practical learning exercises that provide quick access to the thrill of writing code that does your bidding. Along with the book, you are guided to install a bunch of software, including IDLE, a nice interactive python shell with syntax highlighting. The exercises focus on specific concepts and authors do a good job of explaining what is going on, and, just as importantly, what might go wrong.
Overall, I found the storytelling entertaining and educational. I would recommend the book for anyone who wants to learn programming. I think Python is a good first language and many folks use it in “real world” programming as well.
20 Jul 2009
At the end of the school year I taught a series of beginning programming lessons to a class of 30 fourth and fifth graders. Only one or two of them had ever programmed before. I chose to teach the Ruby language in the “Shoes” platform which provides rich graphics and native user interface controls. I’ve written up my experience of each class, including a fun physical demonstration of light as an introduction to RGB color:
The programming exercises are posted here where anyone can use them as is or “fork” the documents and use these as a starting point.
If you find these useful or have other teaching experiences to share, please drop us a note on the RailsBridge email list.
20 May 2009
The first RailsBridge teaching project is a short series introducing a 4th/5th grade class to programming. We decided to use Shoes and the Ruby programming language.
To quote one Railsbrige comment Kids want to learn something that is:
A. Fun
B. Easy
Ok, maybe Ruby isn’t so easy, but relative to a lot of modern programming languages it is pretty good. There is very little “boilerplate.” Programs are fairly concise and to the point. I wouldn’t touch Javascript for kids since the implementations are so inconsistent. Kids can deal with rules as long as they are clearly explained and consistent.
Also, Ruby is a “real” programming language that real-world programmers use for practical purposes. It is effective to teach kids skills that adults use. When I did research for establishing the curriculum goals for our elementary school, I read a lot about “21st century learning skills” where kids learn to use computers and other tech as tools, in the similar manner to how adults use those tools (beyond using “educational software” for teaching specific subjects). I find from personal experience that kids are very motivated when they are learning something that could have application outside of the classroom.
19 May 2009
There are a few reasons why it is important to teach kids how to develop computer applications: